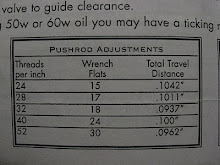
50 Wt Oil = Caramel
Krusty Khrome


We've had this 1970 ironhead engine with peeling chrome that would make a good mill....
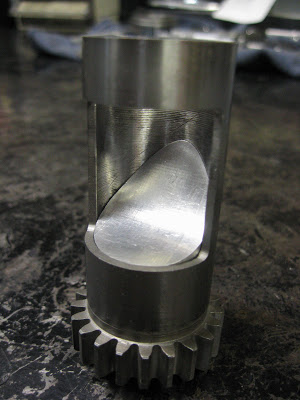
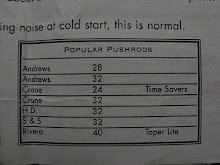
Tappet Weight

The LEFT tappet is lighter by about 1/2 oz. or almost 1 oz. total valve train weight(X 4ea) ...at 5000 rpms, that's a difference...more weight for the valve spring to push down - to hold the tappet on the cam...
1953 Harley KK Model (and some KRs) had hollow tappet adjusters too,
with a hole right down the middle.
NOTE: The RIGHT tappet is stock in Harley WL engines, and what makes it so heavy is that it's thicker, and solid steel. The LEFT tappet is standard on early 900 Sportster engines.
You can run the lighter tappets in WLs, K Models, whatever...they're dimensionally interchangeable, same length, diameter, etc. To most folks, ounces only matter at the post office, or your drug dealer, or the judge.
1965FLH

'52K Update


Some Neat Bikes on Ebay Now . . .
This WLA. Unrestored condition with original paint from Russia and the USA.... It's just got the rustic vibe goin' on.


This knuckle is another one . . .


I really like this low Sportster . . .


Denzer !

One Fast Cookie

He's a cool fella. The fastest cat I've ever had ! He's damn fast !
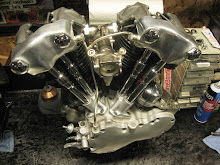
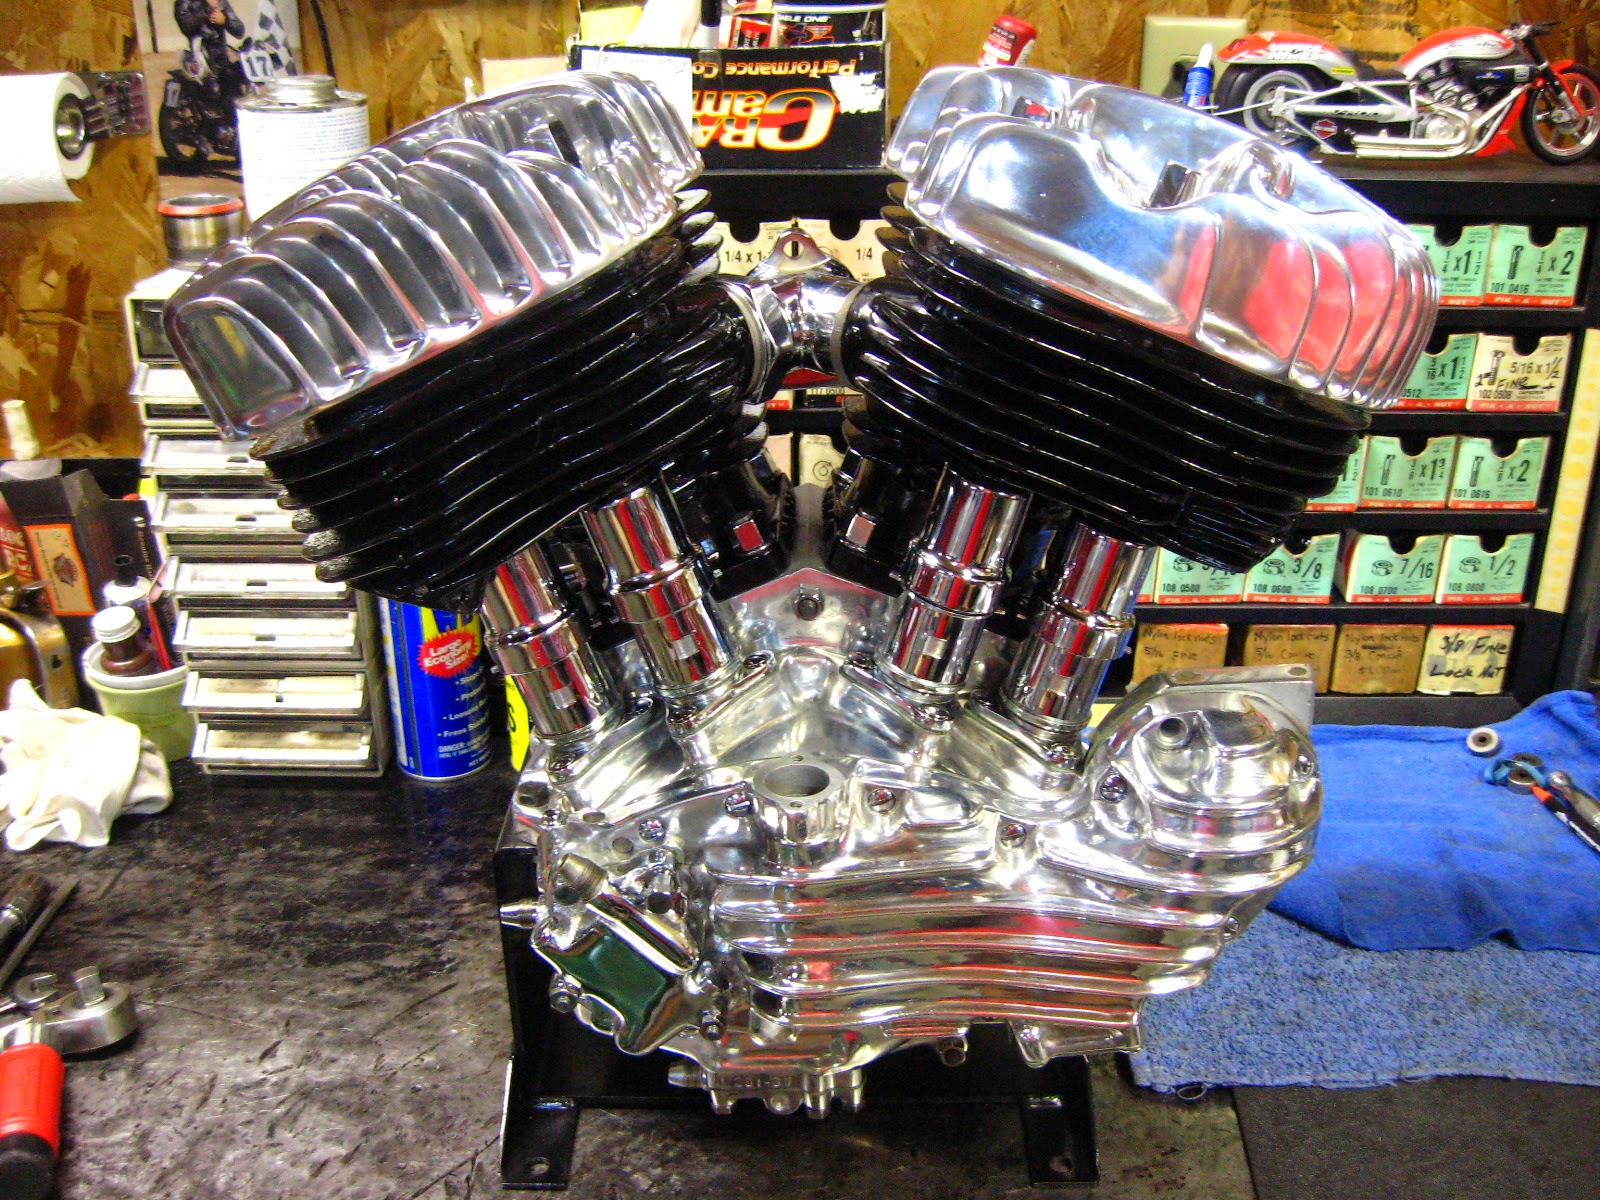
Valves Overhead vs. Valves On-The-Side

Sunday Work
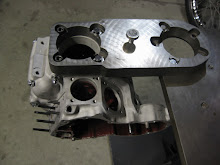
... line-lapping these KHK cases yesterday after replacing the mainshaft race. Now it's nice and straight with the clutch gear(in the door). Cases are show polished.


Sailor's Morning . .


Yes on this one . . .


Harley WR Racing Engine
I've been jammin' the last few weeks to get this WR engine done so I can deliver it to
The Mama Tried Motorcycle Show on Feb. 15-16 in Milwaukee. This particular engine has some documented race history with a top 5 finish in the early 1950s at the legendary Springfield Mile.
 After repairing the engine cases, machining, measuring, etc. Almost every part on the engine has required attention. The motor was together when I received it, but the parts mirrored "swap meet specials" haphazardly assembled. The ball bearing construction appears easy to conquer...but now you're dealing with hand-press-fit on everything. It's very difficult to align the cam timing marks when each cam is pressed into position. I ended up "adding the pinion gear last" since it's slip fit, and the wide mark on the spline is at the same position as the timing mark, so you knew your position. So many particulars need addressed when assembling an engine of this nature. Basically, it's got to be perfect, or destroy shit on initial start up. This is the 5th ball bearing-type engine I've built (with dad too) - and we still spend about as much time reading, as we do building the motor.
 The magneto is a horizontally mounted Wico Single Fire type unit. The ignition timing is best set by
location of the piston to TDC...then verify the timing actual timing mark on the flywheel. On the earlier WRs, once the gear cover is on...you can't change your timing from the outside, since the magneto is bolted solid to the case. No rotation. The Wico cap has a #1 which indicates the REAR(or #1 cylinder) and the spark plug wires must be installed correctly.
 I updated the sprocket shaft seal (from the steel reverse thread seal) to a modern type rubber-lip seal. It required indicating the oem steel outside spacer to dead on a lathe, then turning a recess for the seal (for press fitment)and cutting a snap ring groove. The seal kit (from Colony) is the same as a Big Twin seal, since the sprocket shaft in a WR is the same diameter as a panhead....but instead, runs a large 25mm ID high load ball bearing. A #1205 ball bearing to be exact: 25mm x 52mm x 15mm Superblend-type bearing. This type bearing compensates for crankshaft deflection.

 The lower pump has been checked over, blasted, washed and inspected. I painted it my special cast iron gray, installed, with breather timed. I bumped the breather ahead 1 tooth, since the piston was already about 2" down in the cylinder before it started opening (via breather timing mark). By one tooth advanced, the breather window opens just after TDC - to get that crankcase evacuated of pressurized air a bit sooner. The cylinders had "hardened steel sleeves" installed sometime over the years. I had to purchase specific honing stones to straighten-out-the-tight-spots and generate a usable set of cylinders, since they are already oversized. To win races back in the 1950s, these engine builders used the largest valves, and largest bore sizes, and bent the rules to take wins. Unfortunately, the removal of all this metal leaves nothing behind for restoration. New guides, a couple valves, new springs, all shimmed and set for cam specifications. The cylinder/valve work on these flatheads is usually the most time consuming. It seems simple, but these motors will run and run while still way-out-of-specification. They're usually worn to epic levels. These things just keep on chugging - all the way to the flag !
The Mama Tried Motorcycle Show on Feb. 15-16 in Milwaukee. This particular engine has some documented race history with a top 5 finish in the early 1950s at the legendary Springfield Mile.


location of the piston to TDC...then verify the timing actual timing mark on the flywheel. On the earlier WRs, once the gear cover is on...you can't change your timing from the outside, since the magneto is bolted solid to the case. No rotation. The Wico cap has a #1 which indicates the REAR(or #1 cylinder) and the spark plug wires must be installed correctly.


The pinion side runs a #1204 Superblend type bearing.
20mm x 47mm x 14mm
All bearings require light press fit on shafts and case.
It's just fun times getting all this to fit the way it should...

Top End History
The Harley 45"
Simplicity at it's finest, and most likely the longest running H-D design now and forever. From the late 1930s all the way to 1973 - they're still one of the best designs to ever come out of Milwaukee.

The 74" and 80" Sidevalves
Take the tried and true and trusted reliability of the 45" and make it bigger !

The K Model and KH Model
Take the basic good points and mannerisms of the flathead, unitize the engine block with the transmission, and add a healthy dose of cams, racing style carburetion, pop-up pistons and smoothed ports . . and hold on !

Let's go Overhead !
Since 1936 - it's been the King of the Road for the H-D line. Highly sought by collectors and retro chopper fiends...The Knucklehead in all it's glory.

The Beauty Queen . . . The Panhead
Arguably the engine that put H-D on the map. Reliability and beauty at the same time. The subject of songs, movies and the dream to just have one in the garage with your name on the title (even if it runs or not) I just don't know why they never made it an 80 incher.....

The Tough Guy !
The end result of all it's forefathers . . . The Shovelhead kept the company's (no pun intended) head afloat and lost credo to the Evo as the savior. But, ask any die hard old-timer wrench-n-rider and they'd rather run their shovel than the Evo any day.

The Evolution
It's taken many years, but it's early respect has morphed into the historical respect it deserves. The "rock" of the H-D engine line - It's finally becoming a collector in it's own right. Long live the Evo and welcome to the club !

S&S Air Cleaner (again)

More Mert . . .


Motorcycles Are Expensive

This is turning into a K Model Blog . . .

There's not much down there but a few folding tables where I keep some parts for future builds. I've sold all my parts (except for the K Model stuff, and a few spares). I never really had all that much for parts anyway.
TECH: KK Cylinders
I've had these awhile. They were rusted, needed a bore job, a base was broken, and cooling fins were missing. One has now been sleeved. The fins repaired. The base repaired. They have new guides and new valves. The rusty, pitted valve seats have been ground and lapped.
 That plastic bag has the Eastern Motorcycle Parts spring spacers I'll use to set up the valve springs for a set of KK cams I have collected. These are nice spacers to use, since they have a small lip on top that fits into the valve spring and helps center it on the guide, and hold it in place. I'll measure my installed spring height, then subtract my cam lift (and .070). Then I'll subtract the length of my spring at coil bind. This will leave me with the proper length to make my spacer/shim for that particular valve. I used my Valve Spring Tester to check my springs, and I'll run the 2 strongest on the exhaust valves.

Leaky Manifold


Like Marvin The Martian says, "Delays...Delays."
Subscribe to:
Posts (Atom)