

If you ever find the front of the engine "off" a bit with the frame, try loosening the bolts(on top) where the mount bolts to the cases behind the back jug. Kinda settle it into place with no binding, and tighten all your bolts again. All this thinking might lead to a smoother ride, less cracks, less breakage . . . less aspirin.
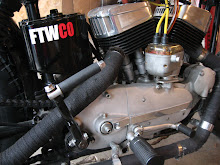
Vintage MC Pistons with 10.5:1 compression ratio, offset wrist pins, set up at .0045 clearance
I also changed my cams around - I'll try P Intakes and PB Exhaust. I want to try and build some
torque. When checking the breather timing, I noticed it wasn't opening until like 2" ATDC and was still open "on the way up" That's bad. The breather hole was lined-right-up with the notch. Thank You Harley Davidson ! We moved it a tooth, and now I open much sooner and she closes "right at the bottom." If you know what I'm talkin' about??? More updates later . . .


3 comments:
Great pictures!!! Love them Ironheads. Keep it coming
Ricky is the 69 still available??
yes
Post a Comment