Juice Brake on a Rigid

You'll need to weld a "backing plate stay" on the lower frame tail for the backing plate anchor stud to bolt to . . . (you can see the narrow, nylon insert lock nut I use).  I left the original (mechanical brake) stay (front middle) in case I want to go back to mechanical brake sometime.

I run a continuous (Russell brand) stainless, braided brake line all the way to a triple junction mounted off my rocker clutch up front.  The top outlet of my 3-way junction has the hydraulic brake light switch.(I use that late model little bugger, availaable at any H-D dealership.  They run 'em on all the new bikes.(I keep a spare in my tool kit in-case the switch would leak, you'd have no brakes !
The opposite side of the 3-way junction has another braided line to my master cylinder.

This is the larger(later) version of the Harley hydraulic brake drum.  Maybe 1968-1972, I think?

The round hook-deal is a bungee hook for when I load it up for travel !


1961 XLCH

CHECK: Tire pressure, oil, primary oil, nut & bolt all the 7/16, 1/2, 9/16, etc.  Make sure everything is sorta tight.  Checked the hose clamps.  Fresh fuel.  Ran it up to about 85-90mph a couple times on some long stretches.  Took some fast, sweeping curves. I kinda hate beating on the thing like that....but it sounds so good when the r's get up there and it starts to sing !   If you had this bike in the 60s...you'd be one of the faster ones.  105+ miles in the books for a sunny Sunday.

Favorite Places....

Sitting on these rocks trying to figure out how to use a few media devices...and on the ground, all around me were feathers, a bird leg, various animal entrails - and a Bald Eagle was circling above me.  I think he just has a meal...?
1952 Harley-Davidson Model K

Baffle Plate / Glyptal / Case Alignment


Here's an early panhead gear cover that's been repaired.  A common problem - they crack around the timer stud boss.  To weld it correctly, the baffle plate must be removed.  I didn't want to assemble the guy's motor without the plate,(or it would puke massive oil into the primary probably) - so I made a cardboard pattern - and my buddy McFarland whittled me out an aluminum plate, drilled out the old solid rivets, and tapped me some holes for screws.  (The S&S gear cover baffle plates are screwed on and they work...so here goes)

...then I masked and painted everything(sealing up any weld porosity) and made it all look so pretty.
The right case needs an over sized race, since it's all oval, and out-of-round.  I'll bolt the case together and align everything the way I want it.  Then we'll mount on a Bridgeport Mill table with the Left Side up.  He'll indicate in the case race to zero, dead center, and note the coordinates.  Then remove the left case - and indicate the Right case race insert to the same coordinates - and bore it for the perfect press-fit of my new +.016 over stock OD case race.  I have this kid McFarland do it for me- he measures like 50 times - and finally does it - and it works.  Then I'll line lap everything and have a nice straight shot for both flywheel shafts.  Makes a smooth running engine - for long life too.

Mike Wilson - Cedar Rapids, Iowa

Here's a photo of Mike sitting on Leo Payne's old "street" bike....a machine he restored - and had much input in the creation of, back in the early days of Cedar Rapids street racing.  I talked to Mike only about 3 times my entire life.  Each one I learned something, 'cause he told me a trick, or tip on each subject matter.  One I can't quite remember was setting the Linkert DC butterfly opening in just the perfect position - and it was a simple, yet complex operation - I should have written it down.  It had to do with filing or positioning the small butterfly bevel.  Hmmmm?? Maybe Wiley knows????  He autographed my dad's History of Motorcycle Drag Racing hard cover book on the inside - with a short note.  These old timers that knew how to make a Harley-Davidson perform are slipping away - so I try to learn as much as I can.  We just need some new young dudes that'll hold that throttle wide open - to test our ideas.  Like Mike had Leo.

Never Judge a Book By It's Cover

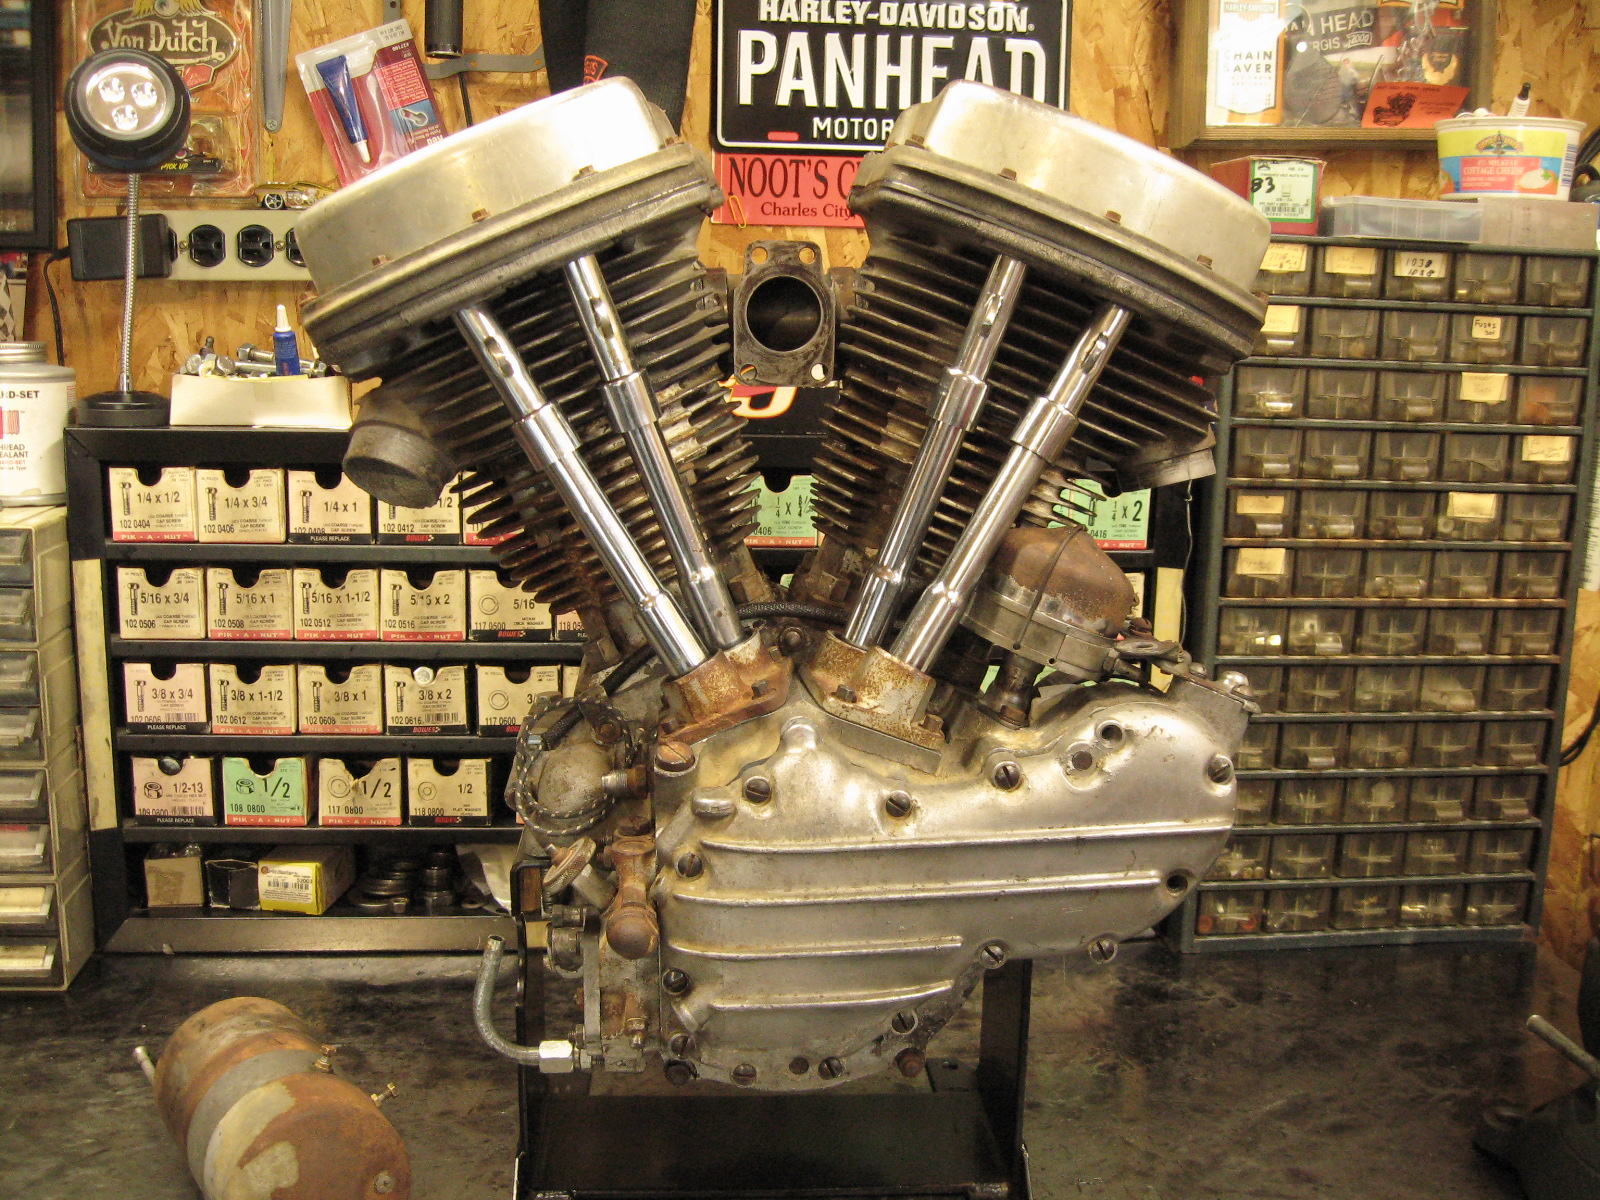
This ol' 1957FL was a real crud when I got it.  I scraped for 3 days as I tore it down.  Soaked most of the parts.  It still destroyed the solvent in 2 different parts washers.  I'd never seen anything so dirty.  Never washed in over 60 years apparently.
Now it's shiny on the inside - still "krusty" on the outside to match the rest of the bike.  Crusty, but clean.  The rods were toast - crank pin was breaking up, rod races where rough and pitted.  Now the lower end has new rod races, new crank pin, everything fit with proper end play and factory clearances - nice.  NOS Sonnax rollers(gettin' rare) all measured perfect.  Oem steel rod cages.  I line lapped the pinion race(just to barely true it up) and fitted +.0002 rollers.  The flywheels trued up sweet, and roll so smooth now. The threads for the aluminum rocker covers didn't need a single heli-coil or repair - they were all perfect - that's incredible !
Even though the parts are rusty, these old, original Harley-Davidson parts fit the best !  They had great quality control back then... the Motor Co. in the 40s, 50s and 60s was hittin' on both cylinders...
The factory timer runs a Blue Streak condenser(I like 'em) and oem points/with an nos shielded coil wire.
I like these original band-type manifold clamps.  Kinda cheesy, but fit nice, and hold tight. I bored the cylinders .040, new cast pistons and Hastings Moly 1/16, 1/16, 3/16(3-piece) oil rings.
I stuck a new Colony sprocket shaft seal in it - the threads were still perfect !  You can take an original seal(steel part) and machine it for a new seal (from your seal supplier) - but these Colony seals are really nice.